

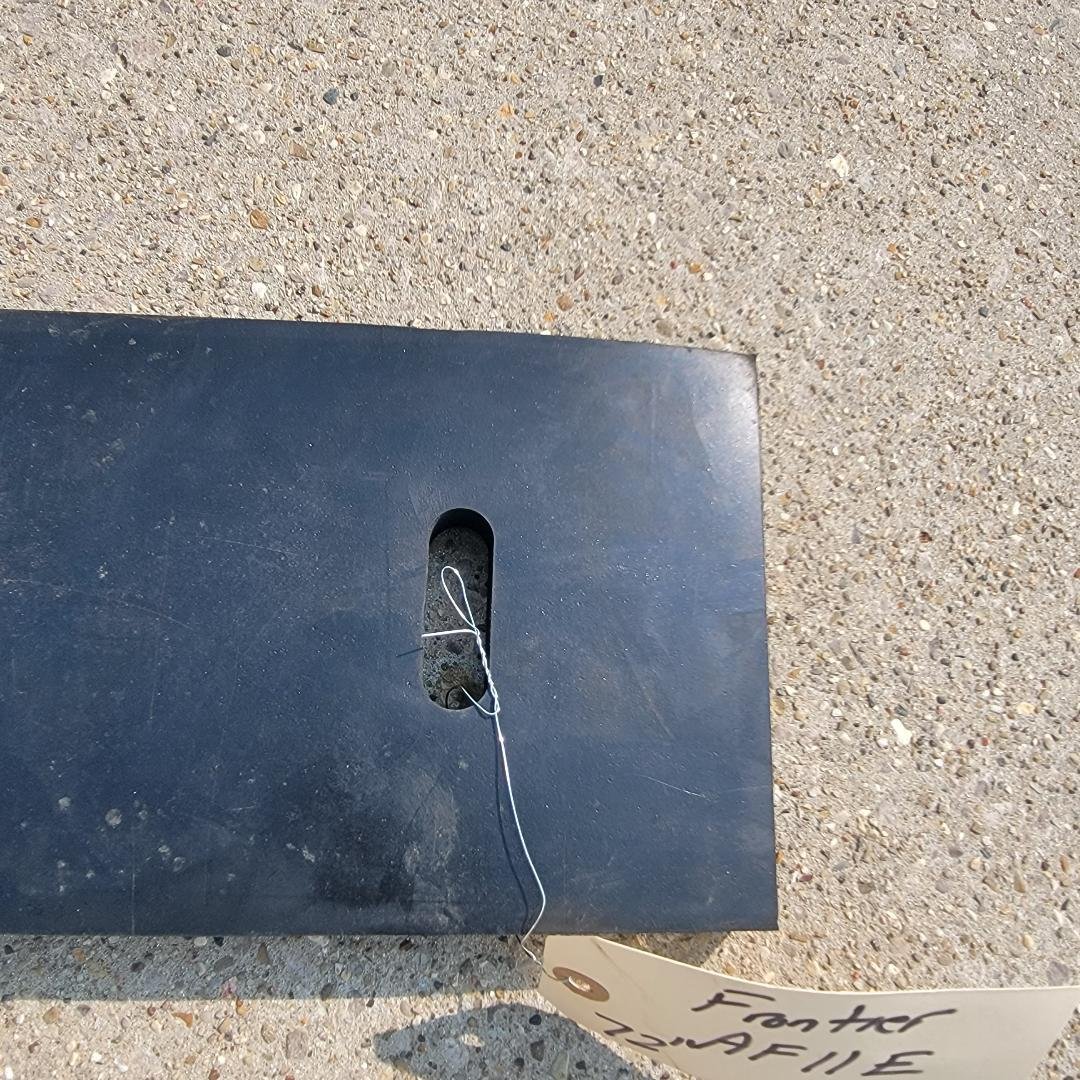


72" CTA Snow Pusher 6" x 3/4", Base Rubber Edge, Profesionally machined for full adjustment
Includes Free Ground Shipping in the Lower 48 States
This is a custom machined 72” CTA Snow Pusher Primary Edge rubber. Machined to perfectly bolt to the CTA SNow Pusher and also fully adjustable and double sided.
Our Kit Includes the following
One, single length 72” Rubber Edge which is professionally cut with the mounting slots in the rubber for full adjustment.
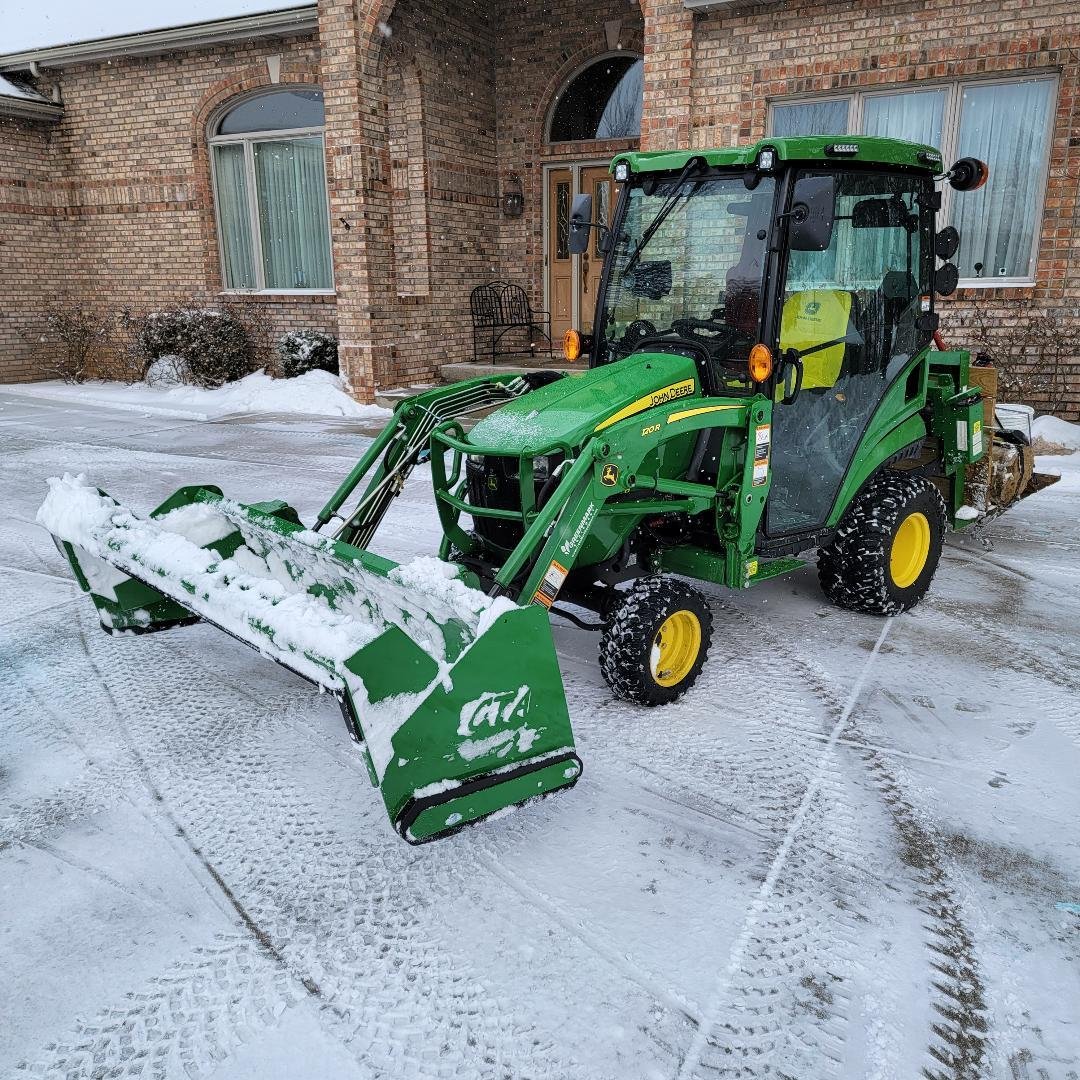
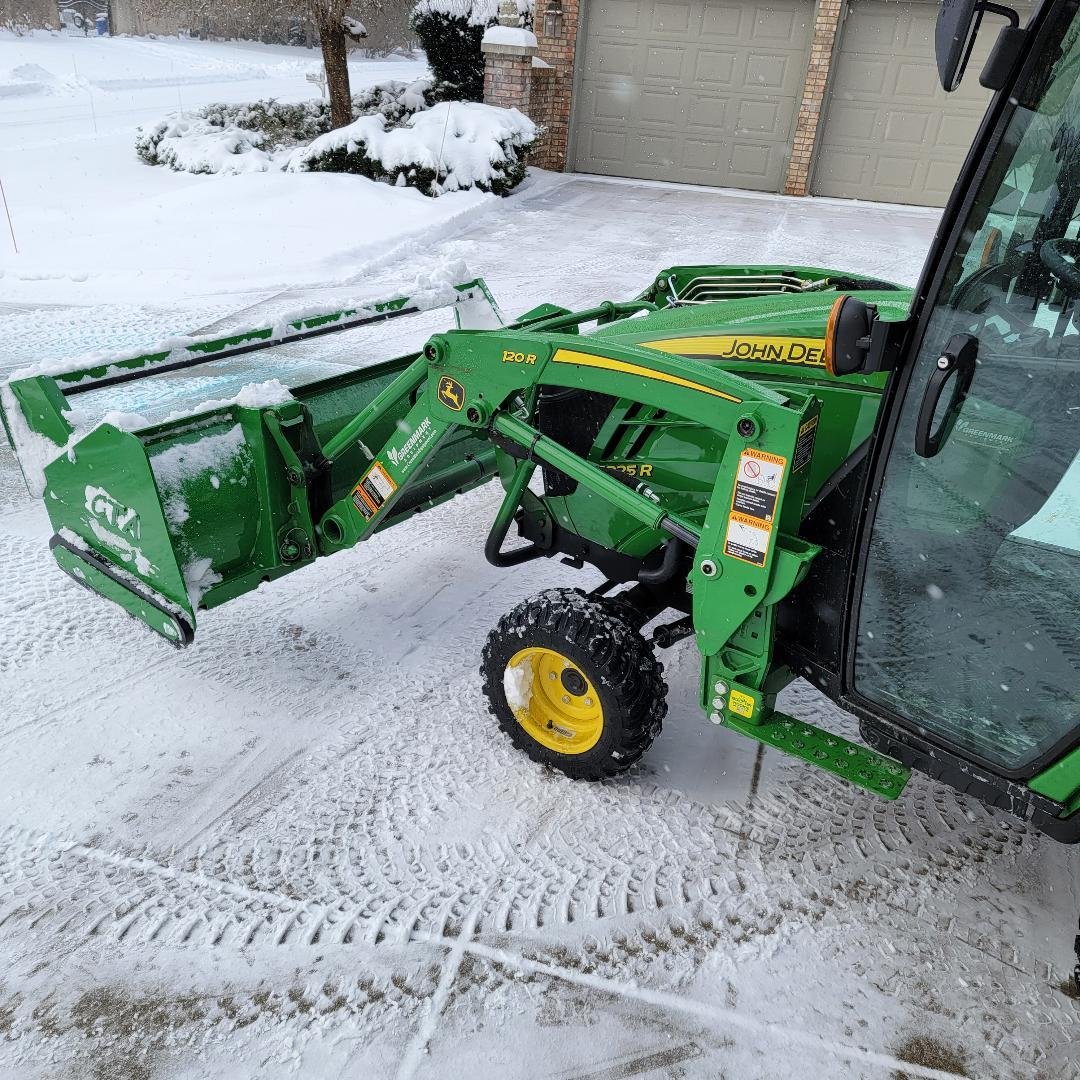
This rubber edge mounts on the base of the CTA 72” Snow pusher under the snow pusher to clear the pavement.
Our Rubber Edge is Fully Adjustable and Double Sided for Maximum Wear life.
When to adjust your snow pushers rubber edge
When the edge isn’t cleaning the pavement as it previously did.
When the pusher seems to keep “hitting” either expansion cracks in the pavement or sections of pavement which are heaved due to frost, etc.
How to Adjust the Rubber Edge on the Snow Pusher
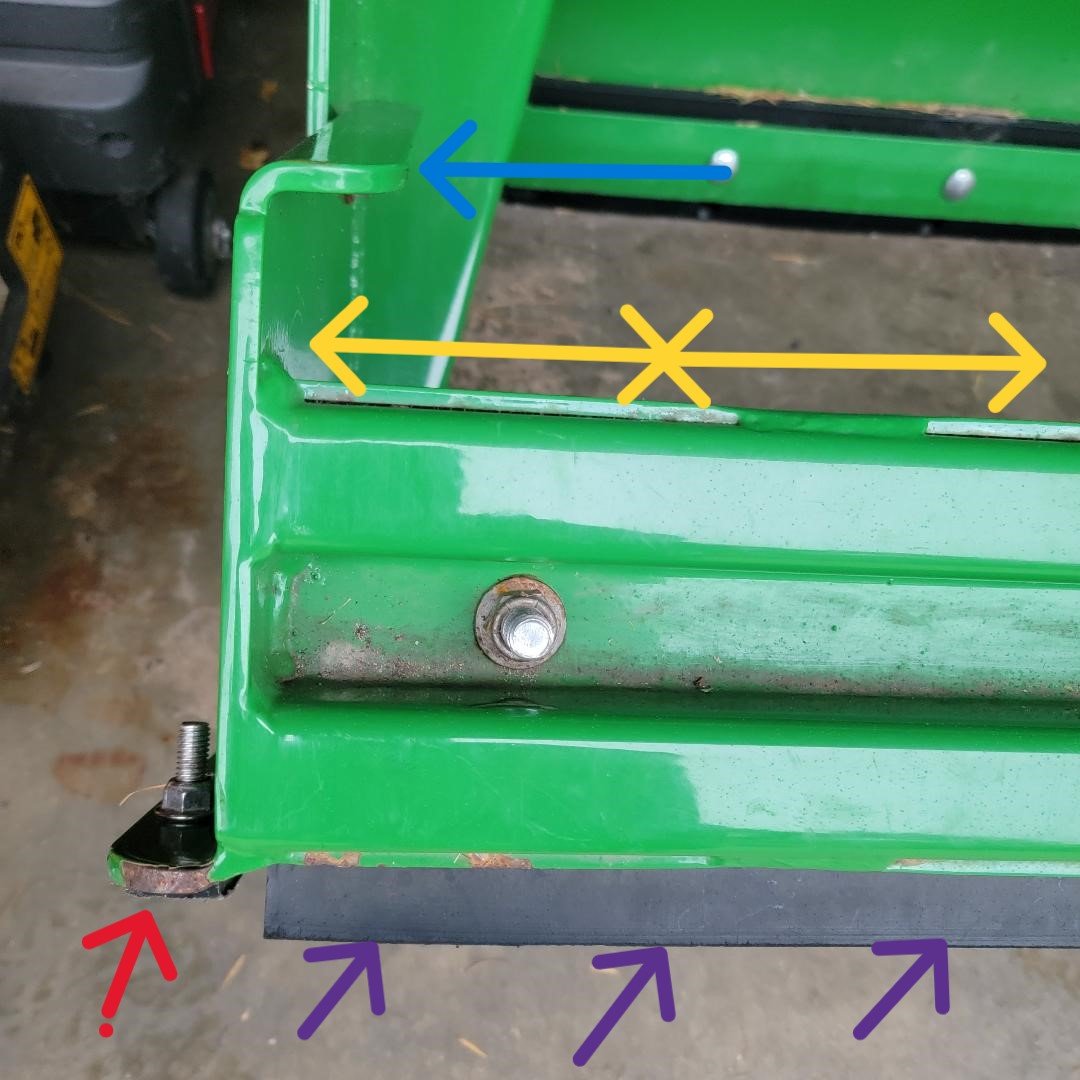
Use a 3/4” deep well socket and reach in the bottom of the snow pusher edge to the back side of the nut holding the carriage bolts. Loosen the nut BUT DO NOT REMOVE THE NUT OT BOLT.
You want to loosen the nut so the metal strap holding the rubber snow pusher edge can be lifted about 1/2” above the rubber.
Make sure all of the nuts holding the rubber edge are loosened and the metal strap which holds the rubber edge can be lifted off the rubber.
Use a dead blow hammer and tap on the top side of the rubber edge, knocking it down to more rubber extends beneath the metal strap.
Make sure the edge is level and the same amount of rubber is beneath the strap on the left, center and right of the rubber material. Retighten one bolt on the left, one in the center and one on the right to secure the rubber edge. Double check the amount of rubber edge showing. If its the same, tighten the remaining bolts.
When to Replace the Rubber Pusher Edge Material and how to replace it.
WHen the rubber edge wears and its been fully adjusted and then flipped over to wear out both sides of the rubber material, its time to install a new wear edge.
Follow the directions 1. and 2. above in the “Adjustment Instructions”
Instead of loosening the nuts on the carriage bolts, remove the nuts using the deep well socket, as the nut is recessed well into the bolt well on the bottom of the pusher.
As you remove the nuts, also pull out the carriage bolts. Once all of the bolts are removed, the metal strap can be lifted off the rubber and the rubber edge removed. Be careful as the steel mounting edge is heavier than you might think and you don’t want to drop it on your foot, etc.
Now that you have the nuts removed, the bolts pulled out and the metal edge strap removed, the rubber is also removed.
Now is a great time to clean the bottom of the pusher if time and weather permits. If you have the time and temperatures to allow it, you may want to touch up any paint on the bottom of the pusher or the metal strap which holds the rubber edge. You don’t want rust to form under the rubber edge or otherwise out of sight on the pusher.
Once the pusher is ready, install the new rubber pusher edge. If any of the carriage bolts or nuts are showing corrosion or rust, I would encourage you to replace them. We sell a kit of the corrosion resistant bolts and also a kit of the Marine Grade Stainless Bolts for use on the this steel strap and holding the rubber pusher edge strap.
Make sure to line up the mounting holes on the rubber to holes in the pusher moldboard. Place the metal strap over the rubber and insert a carriage bolt in the center of the rubber edge and through the metal strap. Starting with the center bolt keeps the steel strap and the rubber in place.
Insert a bolt and using a deep socket, start the nuts on the carriage bolts. Get all hardware FINGER TIGHT ONLY before tightening any of the bolts.
Since these are 1/2” carriage bolts, you can torque them to between 50 ft lbs and 74 ft lbs depending upon the grade of hardware. If you don’t have a torque wrench, tighten the bolts until they are snug and not so you have to strain yourself pulling on a long breaker bar, etc.
Should you have any questions, please feel free to contact us.
If you are interested in replacing the carriage bolts on your CTA snow pusher, check out our hardware kits for the specific CTA Plow or Pusher to get the correct quantity and size of the hardware. Thank you for considering our products.
In Stock items, Out of Stock, Special Orders or
Emergency Situations.
Please note, while we try to maintain this snow pusher rubber in stock, seasonal demands can deplete inventory. Generally, we can manufacture and ship most out of stock items within 10 to 14 business days. We appreciate your patience during this time.
Occasionally, we have production equipment issues and do our best to return them to production quickly. Your business is important to us and we want to get your items headed your way as soon as we can.
If you have an emergency need for an edge which was damaged, etc. and this is preventing you from clearing snow for customers, etc. please contact us and we will do what we can to get you back in service as quickly as possible. Please use our “Contact Us” form and provide the details and we will reply usually within one day or less.
You can also call our office during business hours and leave a message after hours or on holidays or weekends. We receive our emails via text message and try to reply within a day even during holidays and weekends.
Includes Free Ground Shipping in the Lower 48 States
This is a custom machined 72” CTA Snow Pusher Primary Edge rubber. Machined to perfectly bolt to the CTA SNow Pusher and also fully adjustable and double sided.
Our Kit Includes the following
One, single length 72” Rubber Edge which is professionally cut with the mounting slots in the rubber for full adjustment.
This rubber edge mounts on the base of the CTA 72” Snow pusher under the snow pusher to clear the pavement.
Our Rubber Edge is Fully Adjustable and Double Sided for Maximum Wear life.
When to adjust your snow pushers rubber edge
When the edge isn’t cleaning the pavement as it previously did.
When the pusher seems to keep “hitting” either expansion cracks in the pavement or sections of pavement which are heaved due to frost, etc.
How to Adjust the Rubber Edge on the Snow Pusher
Use a 3/4” deep well socket and reach in the bottom of the snow pusher edge to the back side of the nut holding the carriage bolts. Loosen the nut BUT DO NOT REMOVE THE NUT OT BOLT.
You want to loosen the nut so the metal strap holding the rubber snow pusher edge can be lifted about 1/2” above the rubber.
Make sure all of the nuts holding the rubber edge are loosened and the metal strap which holds the rubber edge can be lifted off the rubber.
Use a dead blow hammer and tap on the top side of the rubber edge, knocking it down to more rubber extends beneath the metal strap.
Make sure the edge is level and the same amount of rubber is beneath the strap on the left, center and right of the rubber material. Retighten one bolt on the left, one in the center and one on the right to secure the rubber edge. Double check the amount of rubber edge showing. If its the same, tighten the remaining bolts.
When to Replace the Rubber Pusher Edge Material and how to replace it.
WHen the rubber edge wears and its been fully adjusted and then flipped over to wear out both sides of the rubber material, its time to install a new wear edge.
Follow the directions 1. and 2. above in the “Adjustment Instructions”
Instead of loosening the nuts on the carriage bolts, remove the nuts using the deep well socket, as the nut is recessed well into the bolt well on the bottom of the pusher.
As you remove the nuts, also pull out the carriage bolts. Once all of the bolts are removed, the metal strap can be lifted off the rubber and the rubber edge removed. Be careful as the steel mounting edge is heavier than you might think and you don’t want to drop it on your foot, etc.
Now that you have the nuts removed, the bolts pulled out and the metal edge strap removed, the rubber is also removed.
Now is a great time to clean the bottom of the pusher if time and weather permits. If you have the time and temperatures to allow it, you may want to touch up any paint on the bottom of the pusher or the metal strap which holds the rubber edge. You don’t want rust to form under the rubber edge or otherwise out of sight on the pusher.
Once the pusher is ready, install the new rubber pusher edge. If any of the carriage bolts or nuts are showing corrosion or rust, I would encourage you to replace them. We sell a kit of the corrosion resistant bolts and also a kit of the Marine Grade Stainless Bolts for use on the this steel strap and holding the rubber pusher edge strap.
Make sure to line up the mounting holes on the rubber to holes in the pusher moldboard. Place the metal strap over the rubber and insert a carriage bolt in the center of the rubber edge and through the metal strap. Starting with the center bolt keeps the steel strap and the rubber in place.
Insert a bolt and using a deep socket, start the nuts on the carriage bolts. Get all hardware FINGER TIGHT ONLY before tightening any of the bolts.
Since these are 1/2” carriage bolts, you can torque them to between 50 ft lbs and 74 ft lbs depending upon the grade of hardware. If you don’t have a torque wrench, tighten the bolts until they are snug and not so you have to strain yourself pulling on a long breaker bar, etc.
Should you have any questions, please feel free to contact us.
If you are interested in replacing the carriage bolts on your CTA snow pusher, check out our hardware kits for the specific CTA Plow or Pusher to get the correct quantity and size of the hardware. Thank you for considering our products.
In Stock items, Out of Stock, Special Orders or
Emergency Situations.
Please note, while we try to maintain this snow pusher rubber in stock, seasonal demands can deplete inventory. Generally, we can manufacture and ship most out of stock items within 10 to 14 business days. We appreciate your patience during this time.
Occasionally, we have production equipment issues and do our best to return them to production quickly. Your business is important to us and we want to get your items headed your way as soon as we can.
If you have an emergency need for an edge which was damaged, etc. and this is preventing you from clearing snow for customers, etc. please contact us and we will do what we can to get you back in service as quickly as possible. Please use our “Contact Us” form and provide the details and we will reply usually within one day or less.
You can also call our office during business hours and leave a message after hours or on holidays or weekends. We receive our emails via text message and try to reply within a day even during holidays and weekends.